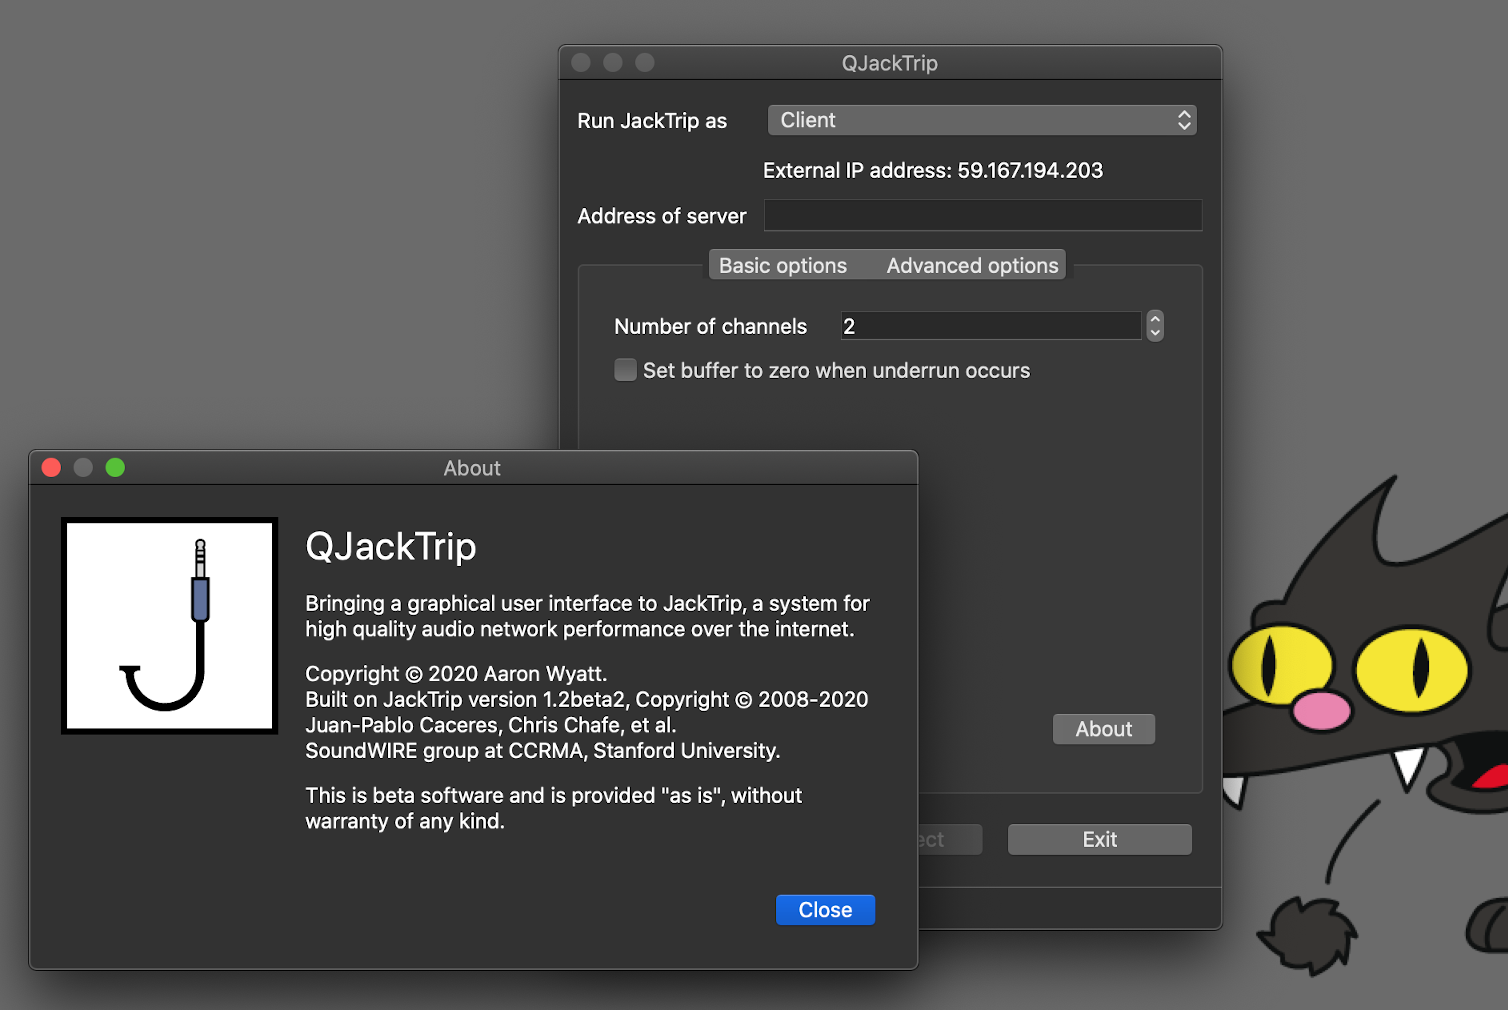
A screenshot of an early version of QJackTrip running on OS X showing the basic interface and about window.
Here are some of the other dev projects that I’m involved in outside of the ScorePlayer.
The PhoneticJack app is a cross platform, Qt command line utility designed for a 24 hour livestream by the Phonetic Orchestra in August 2020. It automated the process of reconnecting QJackTrip/JackTrip and Non-Mixer connections throughout the performance to ensure quick recovery from any internet issues. A paper about the experience and source code should be available in the near future.
QJackTrip started out life as a branch of the JackTrip project developed at the CCRMA (Center for Computer Research in Music and Accoustics) at Stanford, a low latency system for high-quality audio network performance over the internet. It brought an optional graphical user interface to the program that launches by default, making it more accessible to the average user, while still allowing more advanced users to access the original command line version by simply entering the command line options they were accustomed to. As of May 2021, the code for QJackTrip has been merged into JackTrip, and with the release of version 1.4.0 it became the default user interface for the project. More recently though, with JackTrip Labs shepherding the project, and with a focus on the use of their managed servers, there has been a move to a new "Virtual Studio" interface. The original interface is currently still included as "classic mode" but will be disappearing from the app soon. Until that happens, you can find official releases here, but I'll continue to maintain installers for my own builds below:
To run it, you'll need to have the JACK audio server installed. For more detailed installation instructions, and a brief guide on how to get started using QJackTrip, see the Instructions section below. Important: The most recent build of QJackTrip from this site is build 2024123000. (You can find which build you’re running on the about page of the app.) If you encounter a bug, please check that you are running the most recent version, as it may have been fixed. Because my builds are called QJackTrip and are installed to a different location, you can install them alongside a regular JackTrip install. This way you can still access Virtual Studios if you need to. (The best of both worlds.)
To build your own copy of QJackTrip, you can download the source code here. You'll need a recent version of Qt, JACK, and an appropriate compiler.
A screenshot of an early version of QJackTrip running on OS X showing the basic interface and about window.
Below are some brief, step by step instructions detailing how to use the program. They were originally put together for a demo at Stanford, but are gradually being updated to become more comprehensive. The first step will be making sure all of the required software components are installed.
JackTrip runs on Windows, OS X, and Linux, and the exact installation process will depend on your operating system. For Windows and Mac, the easiest (and recommended) way of going about it is to install the prebuilt binaries provided on this page. For Linux, you’ll need to build from source. Important: The OS X binaries provided here will only work on Catalina (10.15) and later. If you’re running an earlier version of OS X you’ll either need to update your operating system or build the software (with the exception of the Jack server package) yourself. (Refer to the Linux instructions below for more detail on that.)
Download and install the following packages:
Download and install the following packages:
Make sure you have the Qt5 development packages, an appropriate c++ compiler, and the jack development libraries installed. (It’s best to use your distribution’s package manager for this.) Once you’ve done this, you’ll need to get a copy of the source code. It’s available here. Alternatively, if you have git installed, on the command line run:
git clone --branch dev https://github.com/jacktrip/jacktrip.git
Once you have the source, make sure you’re in the root directory of the project and run the build script:
cd jacktrip
./build
This will output the compiled program to the builddir folder. On Linux, you can simply copy this file to your /usr/local/bin directory with the following command:
sudo cp builddir/jacktrip /usr/local/bin
If you’re building on Mac, you can create an application bundle from the compiled program using the following commands:
cd "macos"
./assemble_app.sh
For this to work, you will need to have the path to the Qt tool binaries in your PATH environment variable. If you’re using Qt installed by mac ports, running the following command will work to ensure this is the case:
export PATH="$PATH:/opt/local/libexec/qt5/bin"
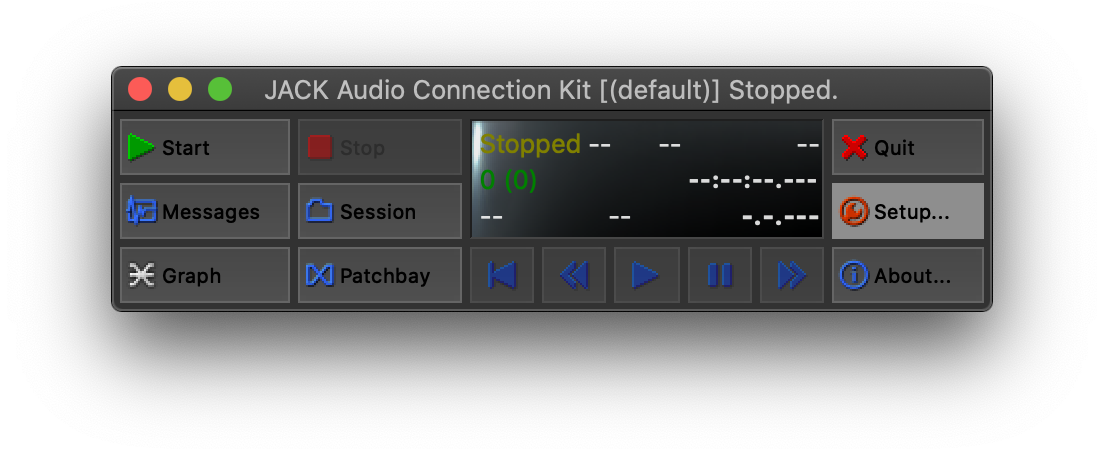 Before you can run JackTrip you’ll need to set up Jack. To do this, run the QjackCtl utility that came bundled with the Jack installer. (Or the updated version that you installed over it.) On OS X, it’ll be in the Jack folder within your Applications directory. On Windows, you should be able to find it through the start menu as Jack Control. Once you’ve launched it, you should see the window on the right (or above if you’re on mobile). Before pressing start, first go into the Setup window. There are two particularly important settings here that need to match up on all of the machines that you want to connect.
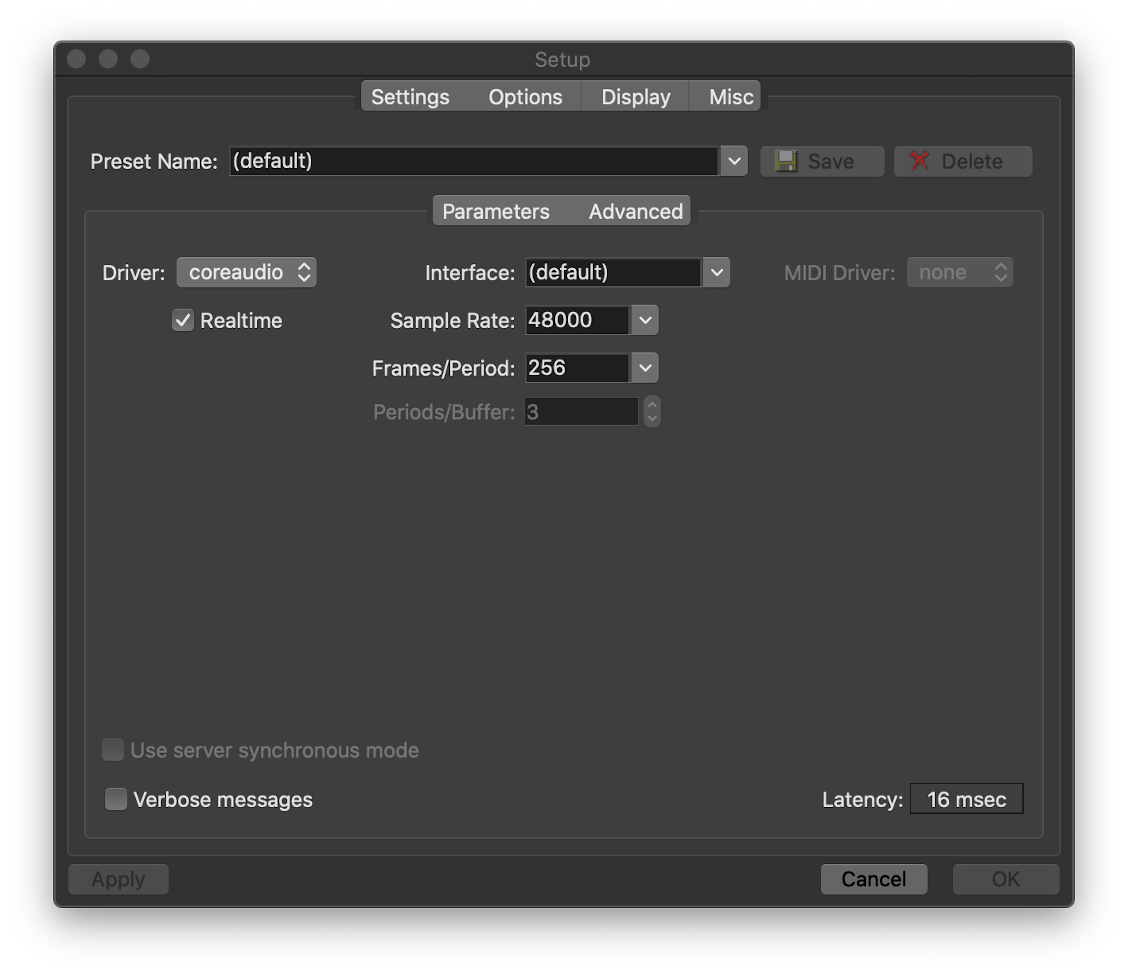 For JackTrip to successfully connect to another computer, the Frames/Period and Sample Rate settings need to be the same. If in doubt, 48000 is a good choice for sample rate: this will give you (slightly above) CD quality audio with a sample rate that most devices (particularly USB devices) are likely to support. The Frames/Period setting is a trade off between latency and reliability: the lower the number, the less latency you’ll experience, but the more reliable your internet connection will need to be to avoid drop outs. With a good internet connection, 256 is probably a good starting point, and you can adjust up or down as needed. (Remember that you’ll need to adjust this setting on both ends.) It’s worth pointing out here that you should connect your computer to your router using an ethernet cable if you can: wireless networks introduce latency and will give you a less consistent experience.
Update: Newer versions of JackTrip incorporate Anton Runov’s jitter buffer work, with a tab dedicated to tuning its settings. Enabling the jitter buffer means that you don’t have to sync up these settings on both sides of the connection any more. Instead, you can push the frames/period value as low as your hardware will allow before suffering xruns and use the jitter buffer’s auto queue length feature to ensure JackTrip’s buffer is long enough to provide clear audio.
The other important setting here is the Interface setting. On Windows, you should use ASIO::ASIO4ALL v2 here. More details about this can be found in the excellent JackTrip instructions put out by CCRMA, which you can find here. (More specifically, check out the Running Jack section.) On Mac, many of the interfaces listed are input or output only. Your best bet here is to leave it on (default) and choose your sound interface in the Sound section of your computer’s System Preferences.
 Once you’ve checked the Jack settings and started the Jack server, it’s time to run JackTrip. If you’ve installed the binary packages or created an app bundle you can just double click on the JackTrip.app icon to run it. (Or on Windows, choose it from the start menu.) Otherwise running it from the command line with no arguments will bring up the graphical user interface.
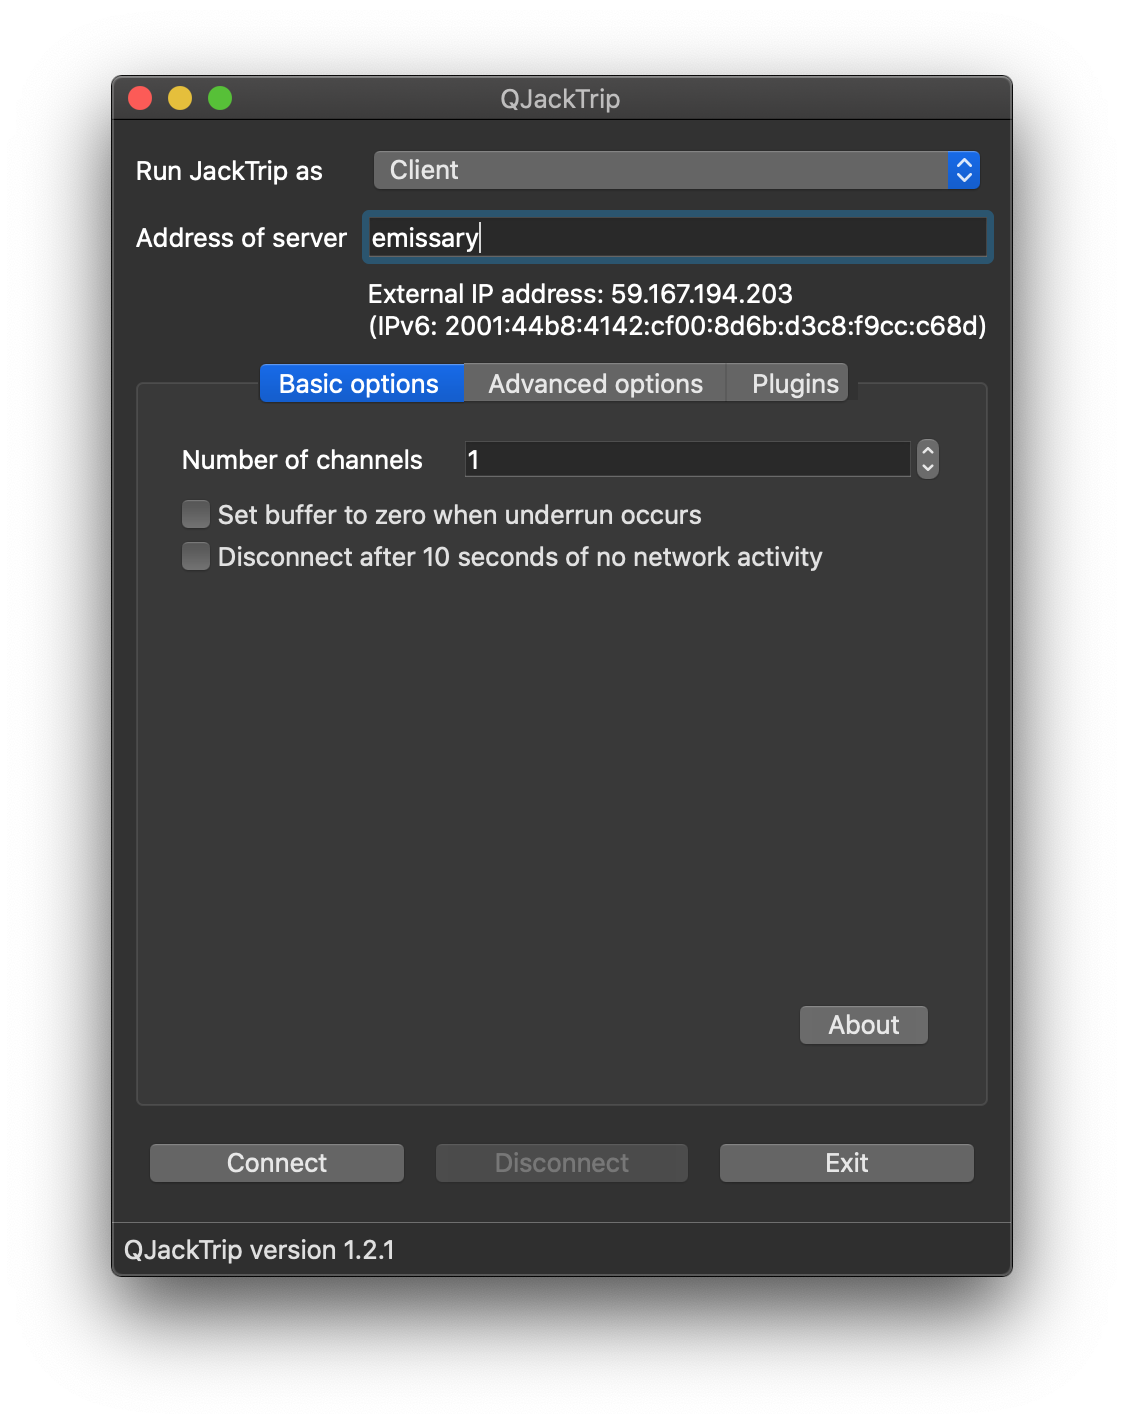
In most cases, setting the basic options will be enough to allow you to connect to another instance of JackTrip. The connection status information that would usually appear on the console in the original versions of JackTrip will be shown at the bottom of the window in the status bar.
At the top of the window you can choose whether to run as a P2P (peer to peer) client, P2P server, hub client or hub server. (The -c -s -C and -S options of the command line.) When running as any type of client, you’ll need to enter the server address below your selection before the Connect button will be available. Changing the run mode of JackTrip will also update the user interface to show only the options that are relevant to it.
The most important thing to know when connecting is whether you should be running in hub mode or not. The original P2P client and server modes are designed to join only two computers together: one running as the client and the other as the server. If you need to connect multiple computers together for a larger ensemble you’ll need to run one machine as a hub server and all of the others as hub clients. The most important thing is that P2P clients always connect to P2P servers, and hub clients always connect to hub servers. You cannot mix and match these two different ways of connecting.
The app uses the ipify api to find and show your public IP address. (It will also show your IPv6 address if you have one.) If running as a server, this is the address that you should give to any remote clients that are connecting. (You will still need to make sure that any port forwarding is set up on your router when using IPv4 to make sure that traffic is directed to your server. Given the range of home routers available and the different interfaces they use, a step by step guide is beyond the scope of these instructions. That said, you need to forward UDP port 4464 from your router to your internal machine to run a P2P server. To run a hub server, you need to forward TCP port 4464 and as many UDP ports starting at 61002 as you have other computers connecting.)
 For those familiar with the command line version of JackTrip, the previous fine tuning options (like the queue buffer length, the port offset, and the audio resolution) are available in the advanced options tab. And with the recent merge of Julius Smith’s code into the dev branch, you can now add effects plugins under the plugins tab to either the incoming audio or the outgoing audio (or both).
Any changes that you make to your settings are saved when you exit the program and restored the next time it is run. And there’s a button that allows you to restore the advanced options to their defaults (on the advanced options tab) if you’re worried that you may have taken a wrong turn somewhere.
Hopefully that’s enough to get you started, particularly if you’re familiar with the original branch of JackTrip. Have fun playing around with it.
(You only need to read on if you’re planning a deployment of a publicly accessible hub server.)
If you’ve ever worked in a tertiary institution like I have, you’re probably very aware of how risk averse university IT departments are. The prospect of having a public facing hub server that anyone can connect to might be too much to bear, and could see you shut down before you’ve even begun. To allay their fears, and to give you greater control over who can access your hardware and when, JackTrip now includes the option to require a username and password from those who connect. If you’re running your server on OS X or linux, you can download this shell script to help you quickly set up a certificate and key for your server. (You will need OpenSSL installed to run it.) It will also create a basic credentials file with a single user, prompting you for a username and password. This initial user will have no time restrictions on their access. To run a hub server from the command line using these generated credentials, use the following command from the directory where you created the credentials:
jacktrip -S -A --keyfile jacktrip.key --certfile jacktrip.crt --credsfile auth
At the moment, the only way to add more users is to manually add them, but I am planning to work on an auth management web interface. To add a user, you simply need to add a new line to the file. Each line has the following format:
username:passwordhash:allowedtimes
The username is self explanatory. The password hash is a one-way, sha-512 hash of the password so that it can be stored securely on the server. It can be generated by running the following command and entering the desired password when prompted:
openssl passwd -6
The allowed times field shows when the user is allowed access to the server. Times are specified as a list of comma separated values in a similar (but not quite identical) way to the pam time.conf file. Days are specified using the first two letters of the weekday (in English), and times are ranges in 24 hour format. Using a * with a day will allow access all day, and using a * alone will allow access 24/7. Leaving the field blank will disable access. So as an example, the following line will allow the user "violarocks" access to the server all day Tuesday, and on Wednesday from 9:00am-12:00 and 3:00pm-6:00pm:
violarocks:$6$ZGRYoRA8061dbbaw$jlB2qRE139miFYukoV0MCwebrCHwFoKi6qx4QHVC2okLcfQgEyoGB8fAle43Chgs3FjR/m4U5a5gue3rJZYww.:Tu*,We0900-1400,We1500-1800
(This will definitely break across multiple lines, especially on mobile, but should be a single line in the file.)
Copyright © Aaron Wyatt, 2020.